Share
OBS WebSocket Guide: Setup, Configuration & Usage Tips Explained

Index
- What is OBS WebSocket?
- How to Install OBS WebSocket
- 4 Essential Steps for Configuring OBS WebSocket
- Specific Steps to Utilize OBS WebSocket
- Commands Available in OBS WebSocket
- Steps to Operate Multiple Devices Using OBS WebSocket and StreamDeck
- Failed to Install OBS WebSocket? Causes and Solutions for Connection Issues
- Conclusion
Many streamers feel they want to “streamline operations during broadcasts,” “smoothly switch between scenes,” and “integrate external tools with OBS Studio.”
By introducing OBS WebSocket, you can remotely control OBS Studio and streamline your streaming workflow.
This article explains the basic overview of OBS WebSocket, how to verify OBS Studio’s compatibility, initial setup, and specific code examples.
Additionally, it covers simultaneous control of multiple devices and troubleshooting connection issues.
By the end of this article, you will be able to reduce operational errors during your streams and create an environment where multiple tasks can be performed with a single action.

What is OBS WebSocket?
OBS WebSocket is a plugin that integrates OBS Studio with external applications. It allows remote control of OBS Studio.
Internally, it uses a communication method called “WebSocket API,” enabling you to send commands to OBS Studio.
For instance, the following remote operations are possible.
- Switching scenes
- Toggle displaying/hiding sources
- Start/Stop recording or streaming
- Adjust audio levels
- Integration with external tools (like Stream Deck, LioranBoard, etc.)
Automation and remote execution can be done with just a single program or button, greatly enhancing the workflow for VTubers and streamers.
This is especially effective when you want to process multiple operations simultaneously or reduce mouse usage during streams.
How to Install OBS WebSocket
To install OBS WebSocket, you need to have OBS version 28 or later installed.
If you already use OBS, you need to check its compatibility.
Let’s go over the basic steps for installation.
Install OBS version 28 or later
OBS WebSocket can be prepared simply by installing OBS Studio version 28 or later.
Since WebSocket is a built-in feature, no additional adjustments are necessary.
Previously, a plugin was required. Currently, using a plugin may cause malfunctions, so be cautious.
The latest version of OBS Studio can be downloaded for free from the official website.
How to Check Compatibility if You Use OBS
If you are already using OBS Studio, you can check compatibility through two methods: verifying the version and WebSocket feature.
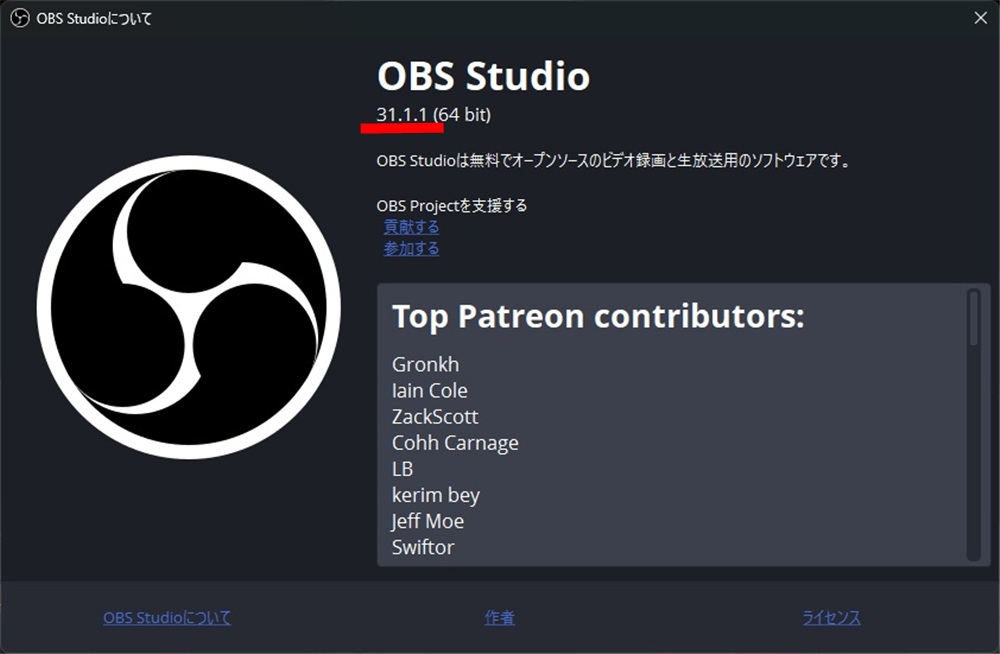
The version can be checked with the following steps.
- Launch OBS Studio
- Click on “Help”
- Click on “About OBS Studio”
The red underlined section in the image that appears following the above steps indicates compatibility if it is version 28 or later.
Additionally, you can check compatibility with the following method.
- Launch OBS Studio
- Click on “Tools”
If you see “WebSocket Server Settings,” it indicates compatibility.
If the version is outdated or if “Tools” does not display this option, consider installing the latest version of OBS Studio.
4 Essential Steps for Configuring OBS WebSocket
I’ll break down the settings needed before using OBS WebSocket into four steps.
This article uses Python.
- STEP1: Open the settings menu in OBS
- STEP2: Enable the WebSocket server
- STEP3: Configure the server settings
- STEP4: Install Python
Let’s look at each step in detail.
First, we need to set up OBS Studio.
Proceed with the following steps.
- Launch OBS Studio
- Click on “Tools”
- Click on “WebSocket Server Settings”
Once the settings screen opens, move on to STEP2.
STEP2: Enable the WebSocket server
Next, configure the settings to enable the feature.
Check the box to “Enable WebSocket server”.
Then, proceed to STEP3.
STEP3: Configure the server settings
In STEP3, you will perform server configuration.
First, you need to set the port.
The server port can stay at the default setting, but you will need to change it if it is being used by other applications.
Next, check the box for “Enable authentication” and set a password.
For testing purposes, it might be more convenient to keep authentication disabled; however, for actual usage, enable it to enhance security.
The password will not be visible as shown in the image below, but you can see it by clicking “Show connection info.”
The password will be used later when integrating with external systems.
STEP4: Install Python
Python is a programming language used to automate streaming operations and API integration, serving as a bridge between OBS Studio and external tools.
To issue remote control commands using Python, follow the steps below for installation.
- Visit the official Python website
- Click “Download”
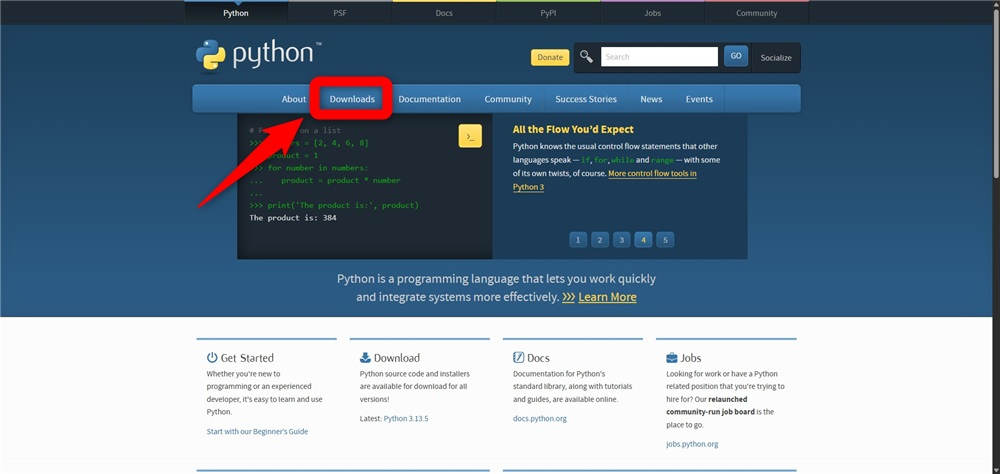
- Click “Download Python”
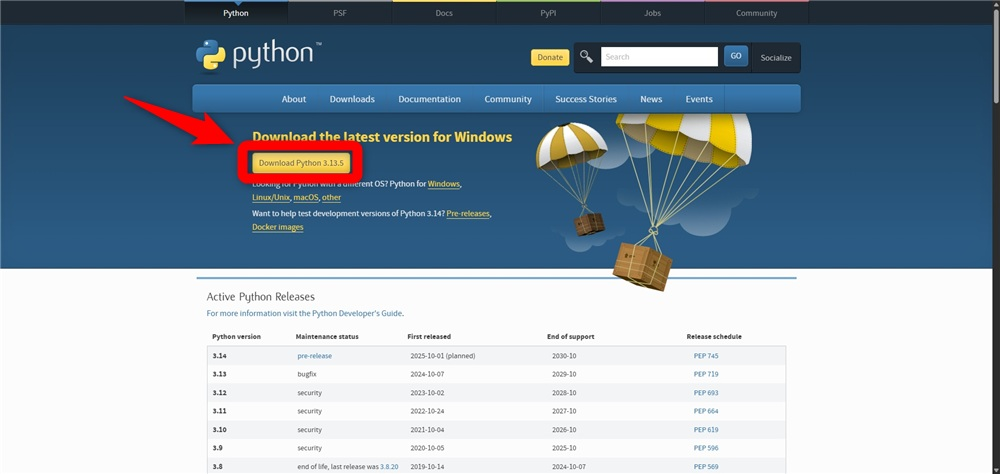
- Double-click the downloaded EXE file
- Open the command prompt and enter “pip install obs-websocket-py”
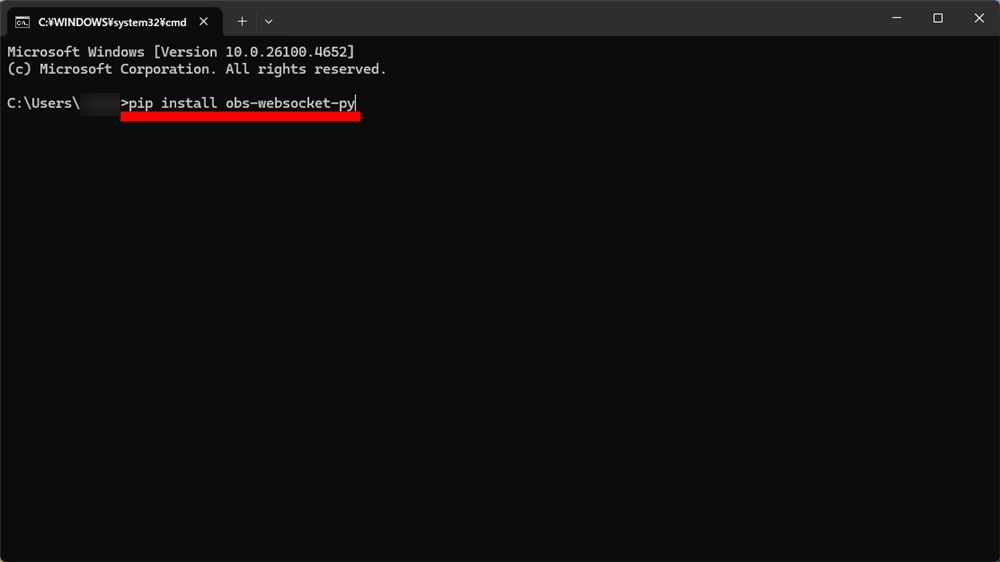
With that, your preparations are complete.
Note that during installation, if you do not check “Add python.exe to PATH” on the initial screen, the command “pip install obs-websocket-py” will not work properly.
Specific Steps to Utilize OBS WebSocket
To remotely control OBS Studio, you will need to write code using tools like Visual Studio Code (VS Code).
In this section, I will introduce four specific steps for remote control using code, along with the basic information for operating OBS WebSocket.
Let’s take a detailed look at how to use it.
Basic Information for Operating OBS WebSocket
To control it remotely, you need to include the IP, port, and authentication password in your code.
First, let’s write the following code.
from obswebsocket import obsws, requests
# Below is the connection information for OBS Studio
host = "localhost"  # Use localhost if on the same PC
port = 4455  # Specify the port
password = "your_password"  # Specify the password
ws = obsws(host, port, password)
ws.connect()
print("success")
# Insert your remote operation code here
ws.disconnect()
print("finish")
The above code will allow you to establish a stable connection with OBS Studio.
Step 1: Retrieve the List of Scenes
Using the command to retrieve the scene list, you can grasp the structure of scenes in OBS Studio.
Append the following code to the above basic information in the section marked “Insert your remote operation code here.”
scenes = ws.call(requests.GetSceneList())
print("Scene List:")
if scenes.status:  # Check if retrieved successfully
    for scene in scenes.getScenes():
        print(f"Scene Name: {scene['sceneName']}")
When you execute this in VS Code, you will receive a response showing the three scenes registered in OBS Studio (Test Registration 1, Test Registration 2, Test Registration 3) as follows.
Scene List:
Scene Name: Test Registration 3
Scene Name: Test Registration 2
Scene Name: Test Registration 1
This allows you to check the names of the scenes registered in OBS Studio, confirming your current OBS Studio configuration.
Step 2: Retrieve Sources of a Scene
Next, let’s retrieve the source information registered in a scene.
In VS Code, write the following code in the “Insert your remote operation code here” section.
scene_name = "Test Registration 1"  # Use the scene name you want to retrieve sources from
sources = ws.call(requests.GetSceneItemList(sceneName=scene_name))
print("Source List:")
for source in sources.getSceneItems():
    print(f"Source Name: {source['sourceName']}")
When you run the above code, you will receive a response showing the sources (Window Capture, Browser, Media Source) registered in Test Registration 1 as follows.
Source List:
Source Name: Window Capture
Source Name: Browser
Source Name: Media Source
This allows you to grasp all the source names registered in Test Registration 1.
Step 3: Retrieve Source IDs
With a command, you can also retrieve the IDs assigned to the sources.
Write the following code in the “Insert your remote operation code here” section in VS Code.
scene_name = "Test Registration 1"  # Use the scene name from which you want to get source IDs
sources = ws.call(requests.GetSceneItemList(sceneName=scene_name))
print("Source ID List:")
for source in sources.getSceneItems():
    print(f"Source ID: {source['sceneItemId']}")
When you execute this, you will receive the IDs of the sources registered in Test Registration 1 as follows.
Source ID List:
Source ID: 11
Source ID: 12
Source ID: 13
The above source IDs correspond to the following source names obtained in “Step 2: Retrieve Sources of a Scene.”
- Source ID: 11 → Window Capture
- Source ID: 12 → Browser
- Source ID: 13 → Media Source
By retrieving the source IDs, coding and operations become much easier.
Step 4: Toggle Source Visibility
You can use the retrieved source IDs to toggle the visibility of sources.
To toggle visibility, write the following code in the “Insert your remote operation code here” section in VS Code.
scene_name = "Test Registration 1"  # The scene containing the target source
sid = 13  # The ID of the target source
scene_Enabled = False  # True=visible, False=hidden
ws.call(requests.SetSceneItemEnabled(sceneName=scene_name, sceneItemId=sid, sceneItemEnabled=scene_Enabled))
Setting the value of “scene_Enabled” to True will display it, and setting it to False will hide it.
There are many other codes available to remotely control OBS Studio, so feel free to write your own unique code.
Commands Available in OBS WebSocket
A list of commands available in OBS WebSocket can be found on the GitHub dedicated page, specifically in docs > generated > protocol.md.
The protocol.md file defines all the command structures, names, and usage instructions.
Below are some of the representative command examples.
| Command | Description |
|---|---|
| GetSceneList | Retrieve the list of scenes for structure overview |
| GetSceneItemList | Retrieve the list of sources within a specified scene |
| SetCurrentProgramScene | Switch to the currently broadcasting scene |
| StartStream / StopStream | Control starting/stopping the stream |
| StartRecord / StopRecord | Control starting/stopping the recording |
All commands are in English, so translation is necessary, but there are plenty of useful commands available.
Check the details in GitHub’s protocol.md.
Steps to Operate Multiple Devices Using OBS WebSocket and StreamDeck
This section explains how to link OBS WebSocket and StreamDeck to efficiently control multiple devices through four steps.
By mastering these steps, you can operate devices with just one action, so let’s take a closer look.
How to Operate Multiple Devices with StreamDeck
StreamDeck is a device that allows streaming operations and application launches with just one button.
In streaming environments, besides switching scenes, you may need to control lighting, audio, cameras, and other equipment.
Even devices not supported by StreamDeck can be simultaneously controlled by integrating with a software called “Companion.”
By using Companion, you can assign multiple commands to a single StreamDeck button, allowing batch control of different devices.
For example, you can set a combined operation to turn on the camera, light, and play background music simultaneously when starting the stream, significantly improving efficiency and precision during broadcasts.
Step 1: Install Companion
First, let’s install Companion, which is available for free.
Proceed with the following steps to prepare.
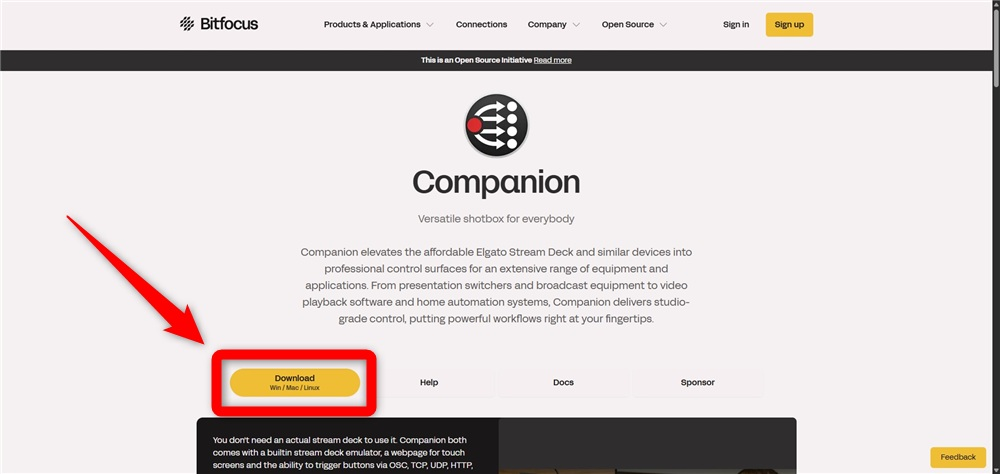
- Visit the official website
- Click “Download”
Since login is required, if you don’t have an account, create a new one and log in.
- Click the Stable section
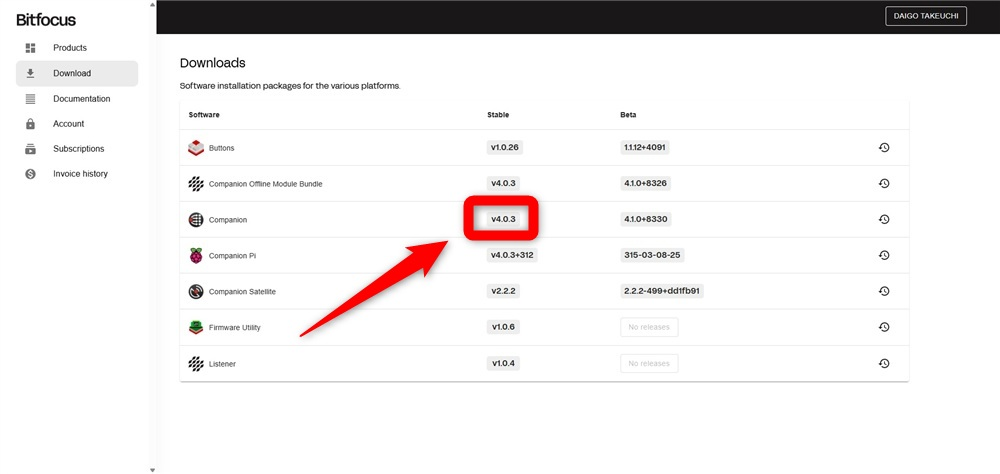
Clicking the highlighted part will start the download.
- Double-click the downloaded EXE file
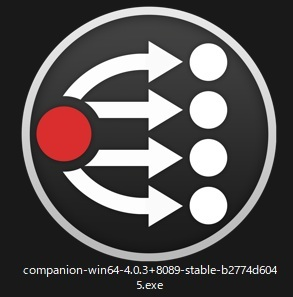
That’s it for the installation!
Step 2: Enable OBS WebSocket
Next, let’s enable OBS WebSocket.
Proceed with the following steps.
- Launch OBS Studio
- Click on “Tools”
- Click on “WebSocket Server Settings”
- Click “Enable WebSocket server”
That’s all for this step!
Step 3: Obtain Connection Information
Now, let’s retrieve the connection information required to integrate with OBS Studio.
You can view the connection information in the settings screen opened in Step 2 by selecting “Show connection info.”
Make sure to obtain the IP address, port number, and password.
Step 4: Input Connection Information into Companion
Now, use the connection information obtained in Step 3 to connect with OBS Studio.
Proceed with the following steps.
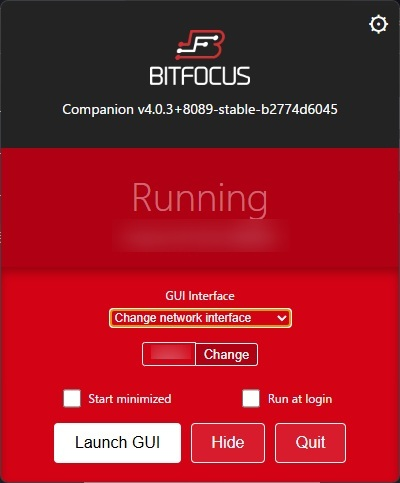
- Launch Companion
- Click “Launch GUI”
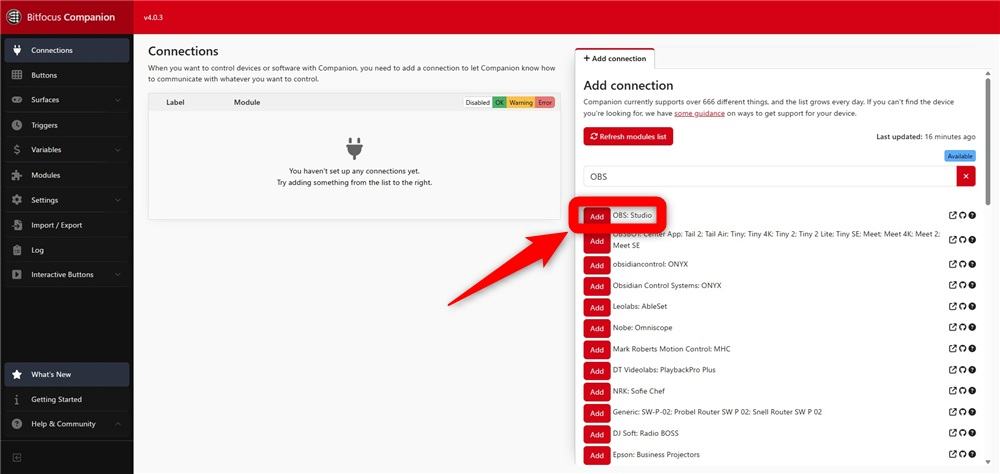
- Search for “OBS”

- Click “Add” on “OBS: Studio”
- Input the connection information in the highlighted area and click “Save”
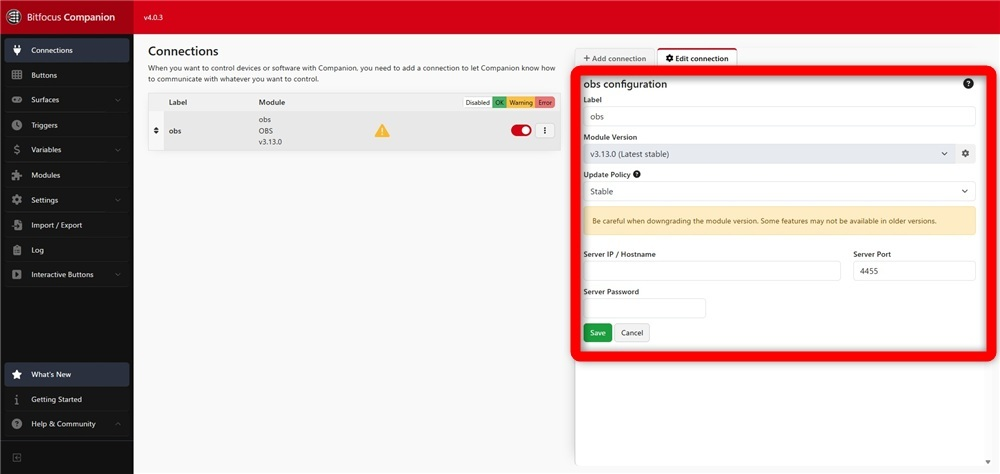
With that, you will be able to simultaneously operate devices outside of OBS Studio with StreamDeck.
Moreover, you can easily design your streaming visuals with Alive Studio, which can be combined with Stream Deck to enhance not only operation efficiency but also the appearance of your streams. If you’re interested, be sure to check it out.
How to set up Alive Studio for Stream Deck?
Failed to Install OBS WebSocket? Causes and Solutions for Connection Issues
This section explains the causes and solutions for connection issues with OBS WebSocket.
- The OBS WebSocket server settings are not enabled
- Incorrect connection information
- Blocked by firewall or security software
- Outdated version of OBS
Let’s go through the points that can be resolved by reviewing settings and environments one by one.
The OBS WebSocket Server Settings are Not Enabled
To use OBS WebSocket, you need to enable the functionality.
Launch OBS Studio, and from the top menu select “Tools” → “WebSocket Server Settings.”
In the settings screen, checking the “Enable Server” option will complete your setup.
Once this setting is enabled, you will be ready for integration with external devices and applications.
Incorrect Connection Information
Incorrect connection information will prevent communication with external tools.
It is important to verify and correctly input the port number, password, and IP address from the OBS Studio settings screen.
Instead of typing, click the “Copy” button in the connection information screen for accurate input.
Blocked by Firewall or Security Software
If firewall or security software blocks communication, no connection will be established.
However, you can resolve this by setting access permissions.
Select OBS Studio in the settings of your OS or software and add permission for communication.
Specifying and allowing the port number helps stabilize connections.
While maintaining security, aim for permissions strictly necessary to ensure smooth integration with external tools.
Outdated Version of OBS
Using OBS WebSocket requires OBS Studio version 28 or later.
Since the WebSocket functionality is included by default, ensure you update to the latest version and verify your connection.
If you want more details on how to upgrade OBS Studio, check out “The Complete Guide to Updating OBS Studio! Troubleshooting Tips Included“.
Conclusion
This article discussed OBS WebSocket.
By utilizing OBS WebSocket, you can remotely control OBS Studio and streamline scene switching and equipment control.
By simply installing the latest version of OBS Studio, you can get started, but preparing for integration with Python and external tools is crucial.
Refer to this article to ensure a safe and efficient setup, enhancing your operational capabilities and productivity in streaming.