Share
Mastering NDI in OBS: Multi-PC Streaming, Setup & Stabilization Tips
Index
Many streamers struggle with thoughts like, “I want to achieve 2PC streaming without buying a capture board,” “I want to introduce NDI in OBS but don’t know the steps,” and “I want to stabilize audio delay and lag during streaming.”
To put it simply, you can build a low-cost, high-quality 2PC streaming environment by utilizing NDI with OBS Studio.
This article explains the basic mechanism of NDI, the benefits of its introduction, the necessary equipment, software preparation, and the installation procedures for DistroAV and NDI Runtime.
Furthermore, it covers specific settings for the gaming PC and streaming PC, as well as points for stabilizing the stream through bitrate adjustment, wired LAN connection, and synchronization offsets.
If you read through to the end, you’ll be able to establish a streaming environment using two PCs and achieve a more comfortable live streaming experience.

What is NDI? Benefits of Using It with OBS
NDI is a technology for transmitting video and audio over a network, which brings benefits to the streaming environment when combined with OBS Studio.
It allows for easy connections of multiple devices within a LAN, reducing the physical constraints of cable connections and enabling flexible streaming.
Since it requires little to no additional equipment to implement, it is suitable for streaming setups that utilize two PCs.
The benefits of using NDI in OBS Studio are as follows:
- Low cost without the need for a capture board
- Improved streaming quality due to reduced load
- Possible to isolate troubles by separating the two PCs
By looking closely at the above benefits one by one, you will understand the characteristics of streaming utilizing NDI.
Low Cost Without the Need for a Capture Board
By adopting NDI as a video transmission method, you can significantly reduce costs by not having to purchase a capture board.
NDI is a technology that allows the transmission and reception of video and audio data in packet format via LAN cables, eliminating the need for a capture card with HDMI input.
Moreover, by installing the NDI plugin and NDI Runtime on both PCs running OBS Studio, you can configure a 2PC setup where the first PC is responsible for video generation and gaming processing, while the second PC handles streaming processing.
This configuration ensures stable streaming while minimizing delay and quality degradation without a dedicated capture board.
This option is perfect for streamers who want to keep initial costs low.
Improved Streaming Quality Through Load Reduction
By utilizing NDI, you can separate content processing and streaming processing across the two PCs, significantly lowering the load on each PC.
The PC performing gaming and video editing focuses on content processing, while the streaming PC only handles video encoding.
As a result, you no longer need to bear heavy processing on a single machine, reducing the risk of video stuttering.
Additionally, the reduced CPU and GPU utilization contributes to stability during streaming, making it easier to maintain high quality and high frame rates.
The advantage of division of labor is that it makes it easier to stabilize the quality of the overall stream.
Isolation of Troubles by Separating the Two PCs
Using NDI to operate two separate PCs makes it easier to isolate the source of problems.
By keeping the PC responsible for gaming and video production independent from the PC handling streaming with OBS Studio, you can create an environment where issues on one side are less likely to affect the entire setup.
For example, if the gaming side experiences freezing or heavy processing, the streaming side can continue to operate stably, thereby preserving the viewer experience.
Conversely, if a setting error occurs on the streaming side, it won’t affect the gaming progress, allowing you to focus on resolving the issue.
By constructing a separated environment, stable streaming and quick recovery become easier to achieve.
Preparation for Using NDI in OBS【Common for Gaming and Streaming】
To use NDI in OBS Studio, it is necessary to complete some fundamental preparations before starting your stream.
The three key points to keep in mind for implementation are:
- Prepare the necessary items
- Install DistroAV (formerly obs-ndi plugin)
- Install NDI Runtime
Check each step to smoothly build your streaming environment.
Prepare the Necessary Items
To conduct NDI streaming with two PCs, you should prepare the following in advance.
- PC: One for gaming, one for streaming
- Network: Wired LAN environment and LAN cables
- Software: OBS Studio, NDI-related plugins, Runtime
First, prepare the two PCs—one to run the games and another for handling the stream.
Also, a wired LAN environment is essential for connecting both PCs to the same LAN.
While wireless connections work, wired LAN is recommended for reliability and lower latency.
Additionally, you need to install OBS Studio on both PCs and prepare the necessary plugins and Runtime to handle NDI.
By preparing the above items, you will lay the foundation for stable 2PC streaming.
Install DistroAV (Formerly obs-ndi Plugin)
By properly installing the latest version of DistroAV (formerly obs-ndi) from GitHub, you can create a safe environment to utilize NDI functionalities in OBS Studio.
The installation steps are as follows:
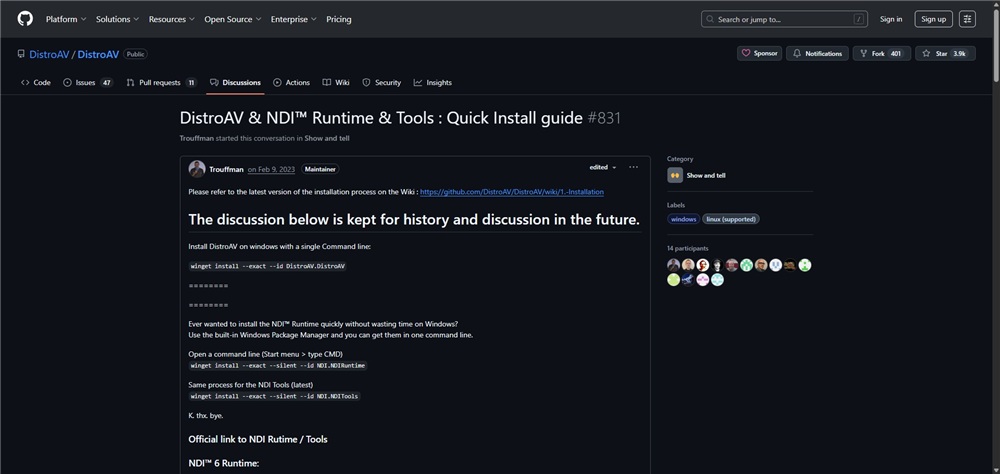
- Access the DistroAV page on GitHub.
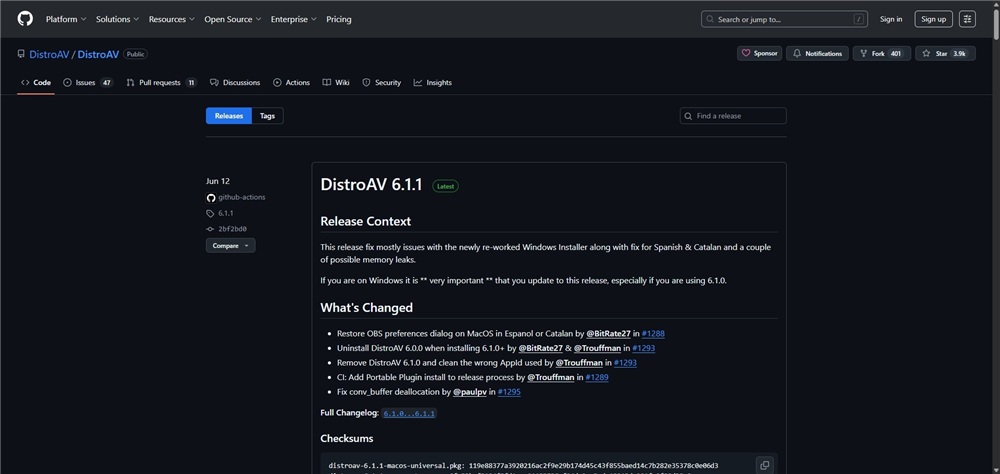
- Download the installer for Windows or the .pkg for Mac from the GitHub release page based on your OS.
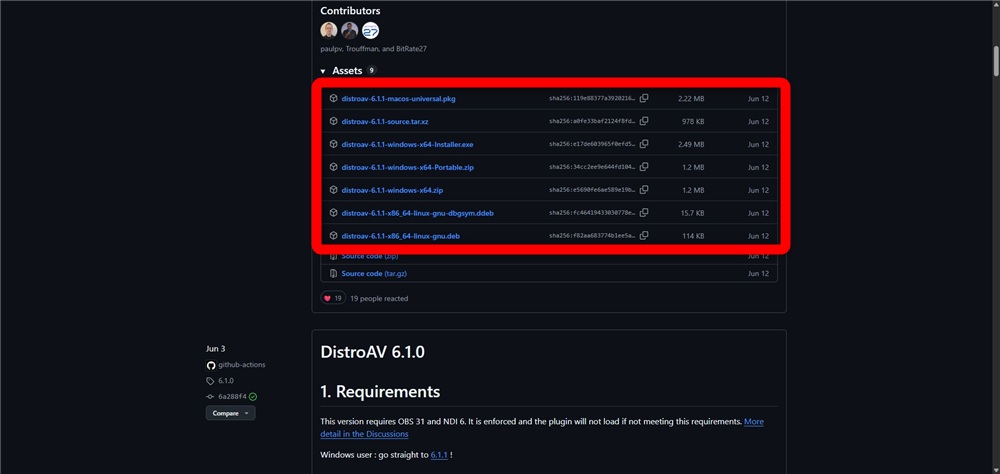
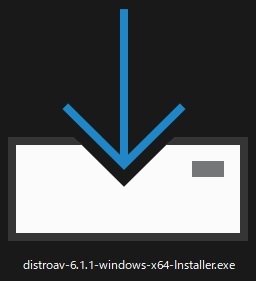
The latest version of DistroAV currently available is 6.1.1.
- Launch the downloaded installer.
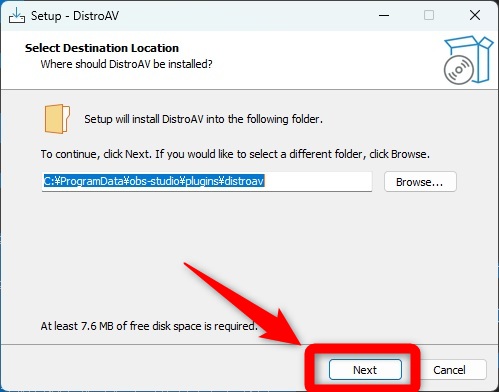
- Verify the installation folder and click “Next.”
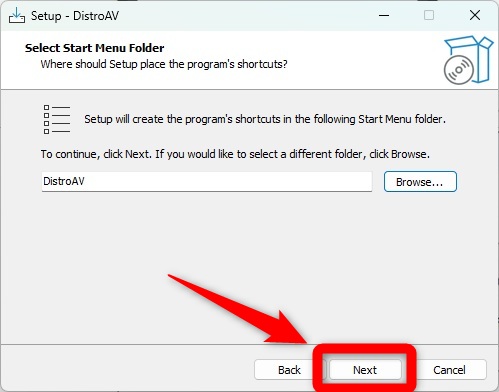
- Specify the start menu folder and click “Next.”
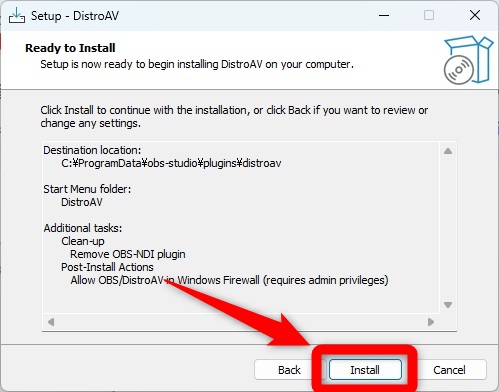
- Confirm regarding the removal of the old obs-ndi plugin and firewall permissions, then click “Next.”

- Click “Install.”
- Click “Finish.”
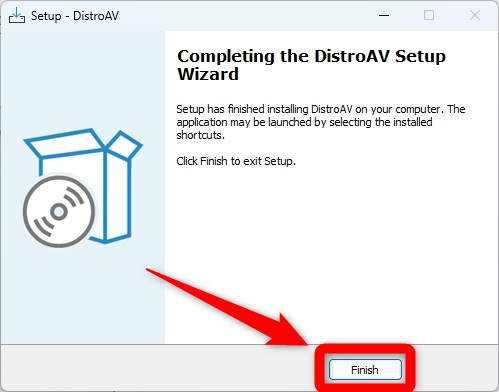
This completes the installation of DistroAV.
Install NDI Runtime
To handle NDI in OBS Studio, it’s essential to install not only the plugin but also NDI Runtime.
Without the runtime, the functions for sending and receiving video and audio will not operate correctly, so be sure to install it.
The installation steps are as follows:
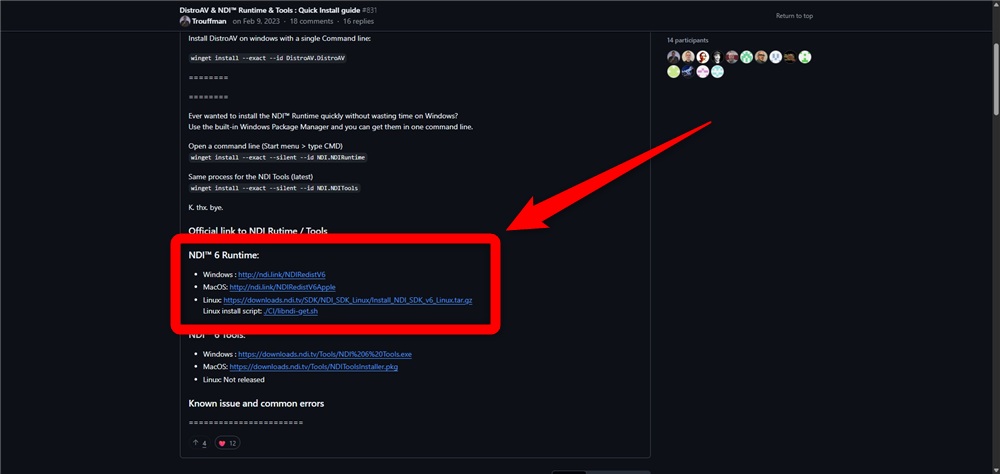
- Access the NDI Runtime page on GitHub.
- Download NDI Runtime according to your OS (Windows as .exe, Mac as .pkg).
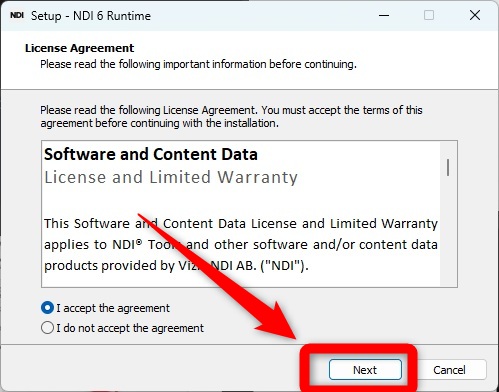
- Launch the downloaded installer.
- Agree to the terms and click “Next.”
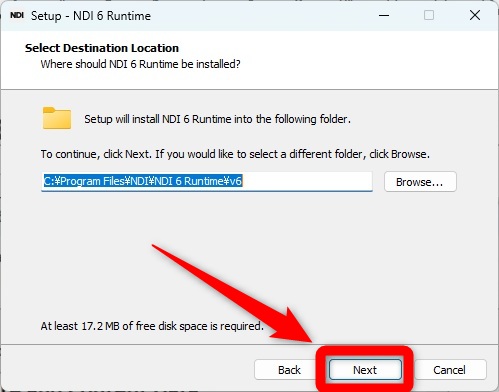
- Select the folder and click “Next.”
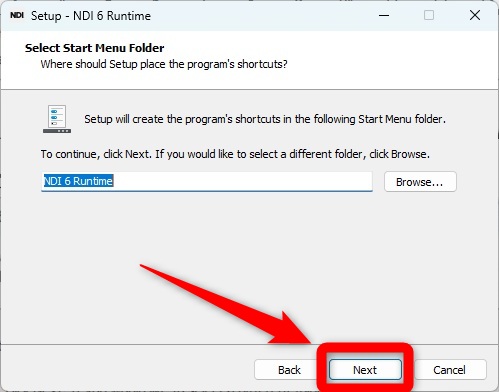
- Specify the start menu folder and click “Next.”
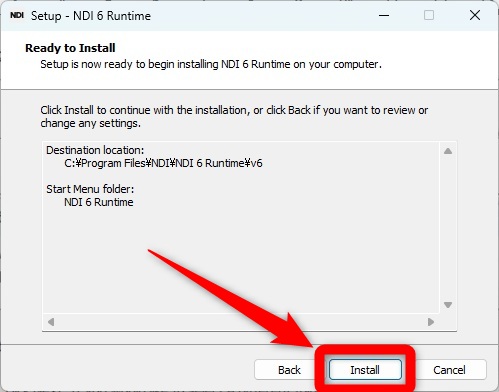
- Click “Install.”
- Click “Finish.”
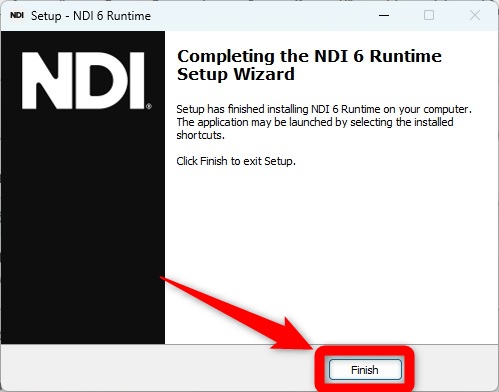
This completes the installation of NDI Runtime.
Note that if you start OBS Studio before installing NDI Runtime, you will see the following error message.
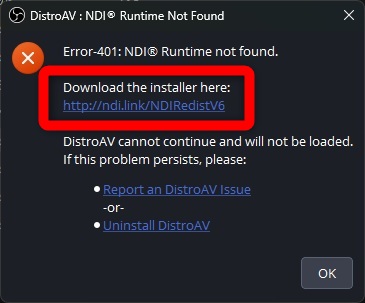
You can also download NDI Runtime from the URL within the red box above.
Setting Up NDI in OBS【Separate for Gaming and Streaming】
To utilize NDI in OBS, you need to configure settings separately for the gaming PC and the streaming PC.
By correctly setting up both the gaming and streaming PCs, you can link the two and achieve a stable streaming environment.
Let’s take a closer look.
Setting Up the Gaming PC
To set up NDI on the gaming PC, follow the steps below.
- Launch OBS Studio.
- Click on “DistroAV NDI® Settings” within the “Tools” section.
- Check “Main Output” and set the “Main Output name.”
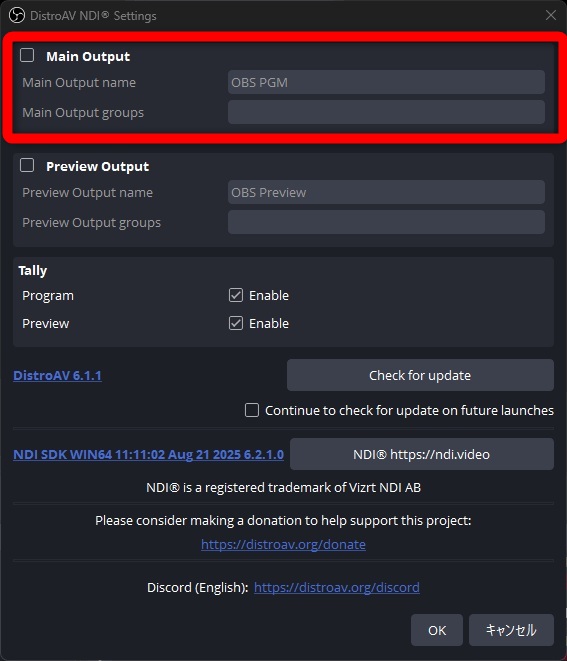
The “Main Output name” is necessary for the streaming PC to locate the video source from the gaming PC. Be careful, as missing this setting will prevent the video from displaying on the streaming PC.
If “DistroAV NDI® Settings” does not appear in the “Tools” section, try reinstalling the latest versions of OBS Studio and DistroAV.
Setting Up the Streaming PC
Once the gaming PC is set up, configure the streaming PC next.
Follow the steps below to set up the streaming PC.
- Launch OBS Studio.
- Click the “+” in the Sources list and select “NDI® Source” to create a new one.
- Input the “Main Output name” set on the gaming PC into the “Source name.”
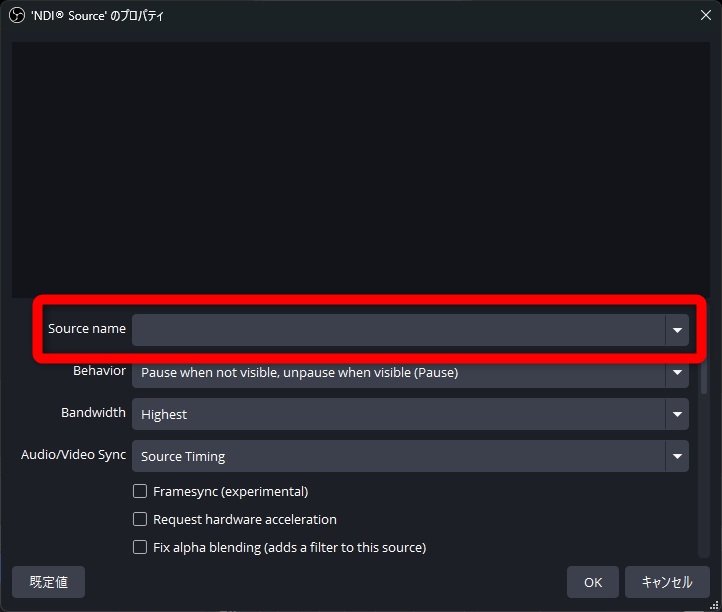
This completes the settings.
If the source doesn’t appear, verify whether the settings on the gaming streaming PC have been properly configured.
Steps to Stream with NDI in OBS
If all preparations mentioned above are in order, you can stream using NDI in OBS Studio with the following steps.
- Start OBS on the gaming PC and set up the streaming screen.
- Start OBS on the streaming PC and add NDI Source from “Sources.”
- Check if the video from the gaming PC is being reflected.
- Start the stream on the streaming PC.
This way, you can start streaming utilizing both PCs.
Key Points to Stabilize Streaming Using NDI in OBS
To stabilize streaming using NDI in OBS, optimizing the connection and settings is essential.
The key points for streaming stability are:
- Bitrate settings tailored to the streaming platform
- Wired LAN connection
- Utilize synchronization offsets to address audio delay
By enhancing your streaming environment, you can mitigate issues like stuttering and disruptions in video or audio, thus achieving a stable live stream.
Bitrate Settings Tailored to the Streaming Platform
To stabilize streaming using NDI in OBS, it is necessary to set an appropriate bitrate for each streaming platform.
Excessively high settings can put a strain on the connection, causing video disruptions, while settings that are too low can greatly compromise quality.
By adjusting to the following recommended bitrates according to the streaming platform, you can achieve a comfortable viewing experience.
| Platform | Recommended Bitrate |
|---|---|
| YouTube Live | 10,000kbps |
| Twitch | 3,000–6,000kbps |
| Niconico Live | Up to 6,000kbps |
| TwitCasting | Up to 6,000kbps |
| OPENREC | 1,500–5,000kbps |
| MiraTive | 500–1,000kbps |
Referencing the above figures, check your connection speed and set it to an optimal value.
Additionally, the guidelines for OBS Studio’s bitrate can be found in the following article, so be sure to check it out as well.
» [OBS Bitrate Guidelines] A clear explanation of settings during streaming and recording
Wired LAN Connection
When performing 2PC streaming with NDI, it is advisable to choose a wired LAN connection for stabilization.
While wireless LAN can work for communication, it is more susceptible to interference and speed reductions which can lead to video distortions or delays.
Conversely, a wired LAN provides a stable bandwidth and can continuously transmit large volumes of video data without interruption.
This is nearly essential, especially for streaming in high resolution or high frame rates.
To create a pleasant streaming environment, prioritize building a wired connection setup.
Utilize Synchronization Offsets to Address Audio Delay
In 2PC streaming with NDI, delays can occur, resulting in audio sync issues.
To correct video and audio timing, using OBS’s “synchronization offset” feature is an effective method.
The procedure is simple: just input the delay time into the “synchronization offset” from the audio mixer settings.
For instance, setting it to around 100ms to 200ms and fine-tuning the numbers while confirming actual streaming will help achieve stability.
With these adjustments, you can prevent audio delays and provide a more enjoyable viewing experience.
Additionally, the audio sync measures in OBS Studio are explained in detail in the following article, so check it out as well.
» What Causes Audio Delay in OBS Streaming? Thorough explanation of fixes and settings
Conclusion
This article explained how to utilize NDI in OBS Studio, covering preparation, settings, and stabilization tips.
By using NDI, you can achieve low-cost 2PC streaming without needing a capture board.
Distributing processing across two PCs reduces the load, leading to improved video quality and stability.
Moreover, separating the PCs makes it easier to isolate issues during troubleshooting, enabling quick recovery.
However, it is essential to correctly install the plugin and NDI Runtime, as well as set up a wired LAN environment during the implementation.
By addressing audio delay and adjusting bitrate as well, you can offer an even better streaming experience.
Using this article as a guide, ensure that you complete the necessary preparations and settings to realize stable 2PC streaming.