Share
Beginner’s Guide: How to Integrate OBS Studio with Alive Studio
Index
Connect OBS Studio with Alive Studio to achieve a higher level of streaming quality. With the rich templates and animation effects provided by Alive Studio, you can easily create a sophisticated streaming screen, as if designed by a professional.
This article explains everything from account creation to integration with OBS Studio, basic usage, and frequently asked questions, making it easy to understand for beginners.
There is also a video explanation, so be sure to check it out as well.

Benefits of Integrating OBS Studio and Alive Studio
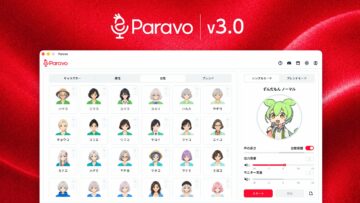
Alive Studio is a service that supports the creation of streaming screen designs by integrating with OBS Studio. You can add various widgets (features) to the streaming screen, displaying more than just the clock.
By using Alive Studio, you can make streaming on OBS Studio more comfortable and easier for viewers to see. Let’s take a closer look at the benefits.
| Benefits | Description |
|---|---|
| Significantly reduce the hassle of creating streaming screens! | Creating elaborate streaming screens on OBS Studio usually requires using multiple tools like image editing software, which can be time-consuming and labor-intensive. However, with Alive Studio, you can create professional-level streaming screens easily by simply choosing from a variety of templates and materials. |
| Enhance quality with abundant materials! | Alive Studio offers a wealth of high-quality materials. This allows for expressions using animations and effects that are difficult to achieve with OBS Studio alone, creating captivating streaming screens that attract viewers. |
| Seamless integration with OBS Studio | Alive Studio is designed to integrate seamlessly with OBS Studio. With intuitive operations, you can easily apply the design created in Alive Studio to the streaming screen on OBS Studio. |
How to Integrate OBS Studio and Alive Studio
Let’s go through the specific steps for integrating OBS Studio with Alive Studio.
Download and Initial Setup of OBS Studio
Here are the steps for downloading and initial setup of OBS Studio.
1.Access the OBS Studio official website: Go to the official OBS Studio website and download the installer compatible with your OS (Windows, Mac, Linux).
2.Run the installer: Execute the downloaded installer and follow the on-screen instructions to proceed with the installation.
3.Launch OBS Studio: Once installation is complete, launch OBS Studio.
4.Auto-Configuration Wizard (optional): The auto-configuration wizard will appear upon launch. This wizard allows you to automatically optimize streaming and recording settings. If you plan to live stream on YouTube, select “Optimize for streaming, recording is secondary” and click “Next.”
5.Video Settings (using the Auto-Configuration Wizard): When using the wizard, you can set the resolution, FPS (frame rate), and bitrate. Use the current value for the base resolution, and select 60 FPS if possible, otherwise 30.
6.Enter Streaming Information (using the Auto-Configuration Wizard): Proceed to the “Stream Information” settings and select “YouTube” from “Service.”
7.Connect with YouTube Account (using the Auto-Configuration Wizard): Click “Connect Account.” A browser window will open asking you to log in to your Google Account. Log in with the account you will use for streaming and authorize access to OBS Studio. Return to OBS Studio, and if the channel name of the connected account is displayed, you’re good to go. Click “Next.”
8.Apply Settings (using the Auto-Configuration Wizard): Once the final result and test completion are displayed, click “Apply Settings.” This completes the initial setup of OBS Studio.
9.If Skipping the Auto-Configuration Wizard: If you skip the wizard, you can make these settings individually from the settings screen. Settings can be changed later.
With the above steps, the download and initial setup of OBS Studio are complete.
If you’re interested in learning how to use OBS Studio, check out the following article.
OBS Studio Guide: Basics to Streaming & Recording for Beginner
Setting Up Alive Studio and Creating an Account
Below are the steps for setting up Alive Studio. If you haven’t downloaded OBS Studio yet, please complete the download and installation first.
1.Download the Script for Alive Studio Setup: First, download the necessary script for Alive Studio setup.
2. Launch OBS Studio: Once the download is complete, launch OBS Studio.
3.Add the Script: From the menu bar at the top of OBS Studio, choose “Tools” > “Scripts.” Click the “+” button in the lower-left corner of the displayed window and select the downloaded script.
4.Add to the Scene: Select the scene you’d like to add Alive Studio to and click the “Add” button.
5.Add a Custom Browser Dock: From the menu bar at the top of OBS Studio, select “Docks” > “Custom Browser Docks.”
6.Dock Settings: In the displayed window, enter a name of your choice for the dock and input the URL provided by Alive Studio in the URL field. Click “Apply.”
7.Log in/Create an Account on Alive Studio: Alive Studio’s authentication screen will appear in the custom browser dock of OBS Studio. Log in with your Google account, or create a new account if you haven’t yet.
8.Agree to Terms of Use: Agree to the terms of use and complete your registration with Alive Studio.
With the steps above, you’ve completed setting up Alive Studio.
Basic Usage of Alive Studio
Here’s a step-by-step guide on using Alive Studio. Please ensure that Alive Studio is displayed in the custom browser dock of OBS Studio.
Step 1: Select Materials
From the menu on the left side of Alive Studio, select the materials you want to place on your streaming screen. You can choose from various categories such as backgrounds, foregrounds, decorations, and comments.
- Backgrounds: Choose a background image that serves as the base of the streaming screen.
- Foregrounds: Select images or videos to overlay on the background.
- Decorations: Choose decorations and icons to accentuate the streaming screen.
- Comments: Customize the area to display comments from viewers.
- Devices: Options include a “Digital Clock” and a “Topic Roulette.”
- Sound Effects: Many sound effects are available to spice up your stream.
- BGM: Choose background music to play during your stream.
Step 2: Arrange Materials
The selected materials can be freely placed on the streaming screen through drag-and-drop. You can also adjust the size, position, and rotation angle. Combine multiple materials to create a custom background.
Step 3: Set Animations (Optional)
Some materials allow for animation effects. Adjust the type, speed, and timing of the animations to create a more engaging streaming screen.
Step 4: Preview the Streaming Screen
Once you’ve placed and set the animations for materials, preview the streaming screen. Make any necessary adjustments and finalize the design.
Step 5: Apply the Streaming Screen
If there are no issues in the preview, save the settings and apply them to your streaming screen. Materials can be changed effortlessly even during live streaming.
Frequently Asked Questions (FAQ) About Integration
Here we summarize frequently asked questions about the integration of OBS Studio and Alive Studio.
| Question | Answer |
|---|---|
| Is the integration of OBS Studio and Alive Studio free? | Using Alive Studio is generally free of charge. While OBS Studio itself is also free, subscribing to Alive Studio’s premium plan is recommended to access advanced features when integrating the two platforms. |
| What materials can be used? | Alive Studio provides various materials useful for streaming. You can use background images, effects, music, and more diverse materials. By using these materials, you can enhance the quality of your streams. By integrating with OBS Studio, these materials can be applied to your stream in real-time. |
| Can Alive Studio be used without OBS Studio? | Currently, Alive Studio is not intended to be used standalone or integrated with other tools. |
| Can the streaming screens created with Alive Studio be used commercially? | Yes, streaming screens created with Alive Studio can be used commercially. However, you cannot download or redistribute material data. Make sure to check the terms of use and use the materials within the appropriate scope. |