Share
How to Share Discord Audio and Screen on OBS: A Complete Guide
Index
- Benefits of Including Discord’s Audio and Screen Sharing in OBS Streams
- Check Recommended Environment and Equipment Before Starting Streaming
- How to Include Discord’s Call Audio in OBS Streaming
- How to Add Discord Screen in OBS Streaming
- How to Include or Exclude Discord’s Audio in OBS
- Testing Methods to Prevent Streaming Troubles
- FAQs on OBS and Discord Audio/Screen Integration
Combining OBS and Discord can enhance the quality of your streams. This article explains how to integrate OBS and Discord by incorporating Discord’s audio and screen sharing into OBS. Let’s aim for an engaging stream while enjoying real-time communication with your viewers.

Benefits of Including Discord’s Audio and Screen Sharing in OBS Streams
OBS (Open Broadcaster Software) and Discord are free tools that support streaming and communication, featuring the following characteristics:
- OBS: A highly functional streaming software capable of configuring screens in real-time
- Discord: A communication tool that allows chat, calls, video calls, and screen sharing
By combining these two tools, you can communicate with viewers in real-time. Using audio and screen sharing makes it possible to deliver easily understandable game streams, helping to attract more viewers.
Check Recommended Environment and Equipment Before Starting Streaming
To ensure a smooth OBS streaming experience, confirm your computer’s specifications and necessary equipment beforehand.
It’s recommended to have at least a Core i5 CPU and 8GB of memory; for higher quality streaming, having more than 16GB of memory is desirable. By using SSD for storage, you can achieve faster read/write speeds and enhance performance.
While built-in webcams and microphones in your computer often suffice, if you’re particular about audio, consider using a condenser microphone or a camera that supports high-definition.
If you’re wondering what kind of computer specs and equipment you need for streaming with OBS, be sure to check out the article below. It covers everything you need based on your streaming goals—helping you choose the right gear.
Essential Streaming Equipment for Becoming a VTuber: Beginner-Friendly Recommendations Included
How to Include Discord’s Call Audio in OBS Streaming
To include Discord’s call audio in OBS streaming, it’s necessary to configure audio settings in both OBS and Discord. Let’s take a detailed look at each setting method.
Discord Audio Settings
Follow these steps on the Discord side to capture call audio in OBS:
- Click “Discord” in the top-right menu
- Open “User Settings”
- Select the “Voice & Video” menu
- Set “Output Device” to “Default” so that the main audio output of your PC can be captured by OBS.
- Set the microphone you use under “Input Device” to ensure that audio is reliably streamed.
With these settings, call audio will be reflected on the OBS side.
OBS Audio Settings
Here’s how to configure the OBS side to capture Discord call audio:
- Click the “Settings” menu at the bottom of the main screen
- Open the “Audio” tab.
- Set “Desktop Audio” to “Default” and capture all sounds from your PC into OBS.
- Set an appropriate microphone for “Mic/Auxiliary Audio” as well and save with “OK”.
By adjusting the volume in the audio mixer and balancing the call sound with your voice, smooth audio streaming becomes possible.
If Only “Disabled” Appears for Desktop Audio on Mac
If your PC is a Mac, only “Disabled” will appear for desktop audio as shown in the image above. Consequently, Mac users will need to install a virtual audio channel separately. Here are the steps:
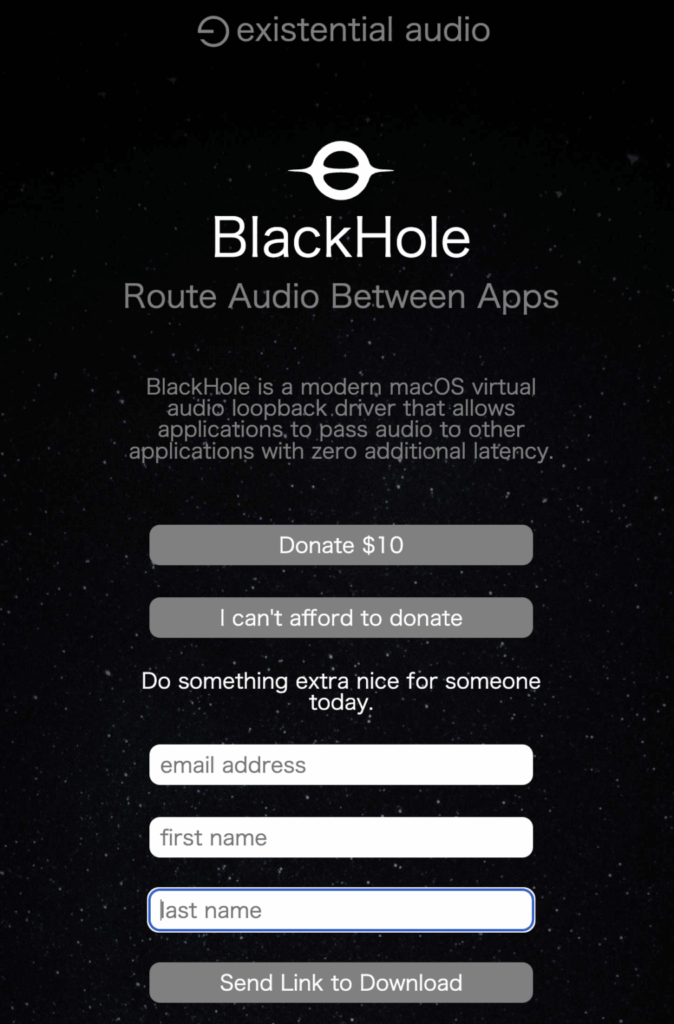
For Macs with M1 or M2 chip
You will use a software called BlackHole. Although it is free, a donate button appears, so if you wish to donate, go through that process, otherwise fill in your email address, first name, and last name, scroll down, and press “Send Link to Download”. A download link will be sent to the provided email address. During installation, you’ll be asked about the channel; either 2ch or 16ch is fine (choose a larger number if using multiple speakers).
Once installed, you can select “Default” or “BlackHole 2ch (16ch)” in OBS settings, but you will not be able to monitor audio as is. Therefore, Mac users need to take an extra step.
For Macs without M1 or M2 chip, try using software called “Soundflower“.
The inability to monitor audio refers to not being able to verify audio through Mac’s speakers or headphones. Since this is inconvenient, it will be necessary to combine the audio of the virtual audio channel and the built-in speaker.
Click “Launchpad” in the Dock on your Mac, then enter “Audio” in the search bar at the top to bring up the “Audio MIDI Setup” app. Open it. Select the built-in speaker and click “Create Multi-Output Device” from the “+” button at the bottom left.
Check the built-in speaker and “BlackHole 2ch” and click “Configure Speakers”.
This will complete the synthesis of audio. Next, select Sound from Mac’s system settings (usually in the Dock at the bottom of the desktop) and set output to “Multi-Output Device”.
This allows you to monitor audio via built-in speakers even when desktop audio is being streamed on OBS. When using earphones or headphones, separate settings are necessary (simply replacing the built-in speaker with external headphones in previous steps), so it is reassuring to pre-configure settings according to the equipment used for monitoring.
How to Add Discord Screen in OBS Streaming
To add the Discord screen to OBS streaming, it’s necessary to set up screen sharing on Discord and capture that screen in OBS. Let’s delve into each configuration method.
Discord Screen Settings
To display the Discord screen in your stream, the following settings are required:
- Check “Enable Streamer Mode” under “Settings”.
- Once the call starts, click “Share Screen”.
- Select the window you want to share and press “Go Live”.
- Click “Pop-out” at the bottom right of the shared screen to display it in a separate window.
- Right-click the screen and uncheck “Show Non-Video Participants”.
With these settings, unnecessary information won’t appear, allowing you to share only essential parts of the screen. Be sure to enable Discord’s “Streamer Mode” to hide personal information and notifications, ensuring safe screen sharing.
OBS Screen Settings
To capture the Discord screen in OBS, configure the following settings:
1. Click the “+” sign in “Sources” and select “Window Capture” (it can also be accessed from “Deprecated”).
2. Specify the Discord screen you previously popped out (such as Discord General) in the properties window that appears, and it will be displayed in OBS.
3. Switch to the preview screen and confirm that Discord’s screen sharing is displayed.
Adjust the screen size and position as needed to create a viewer-friendly streaming screen.
How to Include or Exclude Discord’s Audio in OBS
To include Discord’s screen sharing audio in OBS streaming, simply set Discord’s audio output to your PC’s default and enable “Desktop Audio” in OBS. Conversely, if you want to exclude Discord’s audio from the stream, you need to exclude only the Discord audio from OBS settings. Here are detailed explanations of each setting.
Including Discord’s Screen Sharing Audio in OBS
Here’s how to include Discord’s screen sharing audio in OBS:
- Like call audio, enable “Desktop Audio” in OBS and set the PC’s audio output to be captured by OBS.
- Start screen sharing in Discord by clicking “Share Screen”.
- Click “Pop-out” at the bottom right of the window to display it as a separate window.
- Click the “+” in “Sources” in OBS and add “Window Capture” (or from “Deprecated → Window Capture” in some cases).
- Specify the configured Discord screen.
With these settings, the screen sharing audio will be reflected in real-time to the stream, allowing for a clear and comprehensible stream for your viewers.
How to Exclude Discord’s Audio in OBS
If you configure OBS to exclude only Discord’s audio from streaming, you can stream only the audio of other applications while cutting Discord call audio from the stream. Here are the steps on how to exclude audio:
- Update OBS to version 28.0 or later. (Updates can be made through “Help” → “Check for Updates” in OBS)
- After the update, click the “+” button in “Sources” and select “Application Audio Capture (Beta)” (for Mac, click “macOS Audio Capture” and then select “Application Audio Capture” from the method selection).
- By specifying “Discord”, you can separate Discord audio, which will be excluded from streaming.
By following these settings, unnecessary audio won’t be included in the stream, providing a clear audio environment for your viewers. This is a convenient method when audio adjustment is necessary.
Testing Methods to Prevent Streaming Troubles
To prevent streaming troubles, it is important to conduct audio and visual tests beforehand. By testing prior to streaming, you can ensure that OBS and Discord settings are properly linked.
【Test if OBS Video is Displayed on Discord】
- Open “Voice & Video” settings in Discord.
- Set the output device to “Default” and the camera to “OBS Virtual Camera”.
- Press “Test Video” in the preview section to check if OBS video is displayed on Discord.
【Test if Audio is Reflected in Streaming】
- “Audio Mixer” settings in OBS
- Adjust the volume of “Desktop Audio” and “Mic/Aux” and confirm if the audio is reflected in the stream
【Other Audio and Visual Tests】
1. Conduct a private server or limited broadcast.
2. Check audio and visual from an actual viewer’s perspective to easily detect minor issues.
Conducting these tests beforehand can prevent troubles during streaming, providing viewers with a smooth viewing experience.
FAQs on OBS and Discord Audio/Screen Integration
Various audio and visual issues related to OBS and Discord integration are likely to arise during streaming. Let’s confirm concrete solutions for these troubles to ensure a smooth streaming experience.
If you can’t hear audio when performing screen sharing on Discord, check the following:
【Speaker Mute Settings】
If audio isn’t heard during screen sharing, first confirm that your speakers aren’t muted. You can check mute settings from the icon at the bottom of the call screen.
【Output Device and Audio Settings】
Make sure that the output device (speaker) in Discord’s audio settings is configured correctly. Verify that the chosen speaker is accurate and that “Output Volume” is adjusted appropriately.
【Device Volume Settings】
Check if the volume on your smartphone or PC is muted or set too low. Make sure the volume is sufficient.
【Input Sensitivity and Noise Suppression Settings】
If input sensitivity auto adjustment or noise suppression is enabled in Discord’s audio settings, audio may not be captured. Turn off input sensitivity auto adjustment, adjust the bar all the way to the left, and test if the audio is audible.
Why Isn’t Discord Displayed in OBS?
If Discord’s screen doesn’t appear in OBS, there might be several causes.
【”Streamer Mode” Settings】
Check the “Streamer Mode” settings on Discord and verify that “Hide Discord Window in Screen Capture” is unchecked. If enabled, the screen is not displayed in OBS, so pay attention to this setting.
【”Sources” Settings】
Ensure that the Discord window is correctly selected in OBS’s “Sources” settings. If the window is minimized, it may not display, make sure to make the window active and capture it again in OBS.
What to Do If Discord’s Audio Cuts Out?
If Discord’s audio cuts out, first check the stability of your network. If the network is unstable, it’s important to improve connection speed.
If the audio sounds muffled, enabling “Noise Suppression” and “Echo Cancellation” from Discord’s “Voice & Video” settings can help stabilize the environment by reducing ambient noise.
What to Do If Discord’s Audio is Echoing in OBS?
If you hear echoing audio from Discord in OBS, the cause may be the audio monitoring settings.
From OBS “Advanced Audio Properties”, setting “Audio Monitoring” to “Monitor only (mute output)” or “Monitor and output” can prevent double audio.
Prevent double audio to ensure that viewers receive clear audio.
What to Do If Discord’s Volume is Too Low?
If Discord’s audio feels too low, adjusting it by raising “Output Volume” within Discord can help.
You can also adjust the balance in OBS’s audio mixer, mixing game sound and your voice appropriately, making it easier for viewers to hear.
This time, we explained how to enhance real-time communication with viewers by linking OBS with Discord. With proper setup, smooth audio and video sharing are possible, making your stream more engaging.