Share
OBS Backup Guide: Complete Tutorial on Restoring and Useful Plugins
Index
By backing up OBS Studio (hereinafter referred to as OBS), you can prepare for unexpected PC failures, streaming on a different PC than usual, or when you buy a new PC. By keeping your settings backed up, you won’t need to configure everything from scratch even when switching PCs, which is very convenient.
This article explains how to back up (export) and import (restore) OBS settings, use plugins for backup, and important points to note about backups.

Why is it necessary to back up OBS?
Backing up the settings stored in OBS is crucial for protecting your data from issues like device failures, theft, or loss, and for transferring settings to another PC.
If you don’t back up your settings, you will have to manually reconfigure everything from scratch if you need to restore your original settings or if OBS experiences issues requiring reinstallation or initialization. Even if you’ve noted down your OBS settings, recreating them from memory can be extremely cumbersome.
The overview of how to back up settings saved in OBS is as follows:
- Export the settings and save them in a different location
- Import the exported settings to a new device
For detailed explanations regarding saving settings in OBS, please refer to the following article.
OBS Setup Guide: 2 Ways to Save Settings, Backup & Restore
The next sections will specifically explain backup-capable settings and procedures in OBS.
Two types of settings you can back up in OBS
The settings you can back up in OBS are as follows:
- Scene Collection
- Profile
Let’s look into each setting in detail.
Scene Collection
In OBS, a Scene Collection is a feature that allows you to save the content that is displayed by default at the bottom of the OBS main screen, such as scenes, sources, and the audio mixer. By leveraging Scene Collections, you can modify OBS settings to match your streaming content and retrieve scenes or sources as needed. It can be conveniently used for saving OBS settings tailored to specific streaming purposes like game streaming, singing streaming, or chatting streaming.
Once you’ve set and saved scenes, sources, and the audio mixer in advance, you can easily select your preferred setting just by choosing it when streaming. By backing up (exporting) settings stored in OBS and importing them to a different PC, you can continue using the settings you have been using up to that point.
Profile
In OBS, a Profile refers to a feature for saving settings for streaming and recording. It is available in the OBS toolbar and allows for smooth switching of settings according to the purpose of the scene or stream.
It can be convenient for setting bitrates or URLs tailored for Twitch or YouTube purposes, or for switching between vertical and horizontal screens. Using Profiles lets you save settings with a single click according to the streaming purpose.
How to back up and the procedure for OBS settings
In backup, start from exporting the settings saved in OBS. Exporting means writing out data on a PC or other device in a specific file format. It is necessary for using it with other applications or sharing externally.
When exporting settings, proceed with the following three methods:
- How to export a Scene Collection
- How to export a Profile
- How to back up OBS settings by copying & pasting folders
Until you get used to the process, it’s recommended to export each item separately instead of all at once.
How to export a Scene Collection
Export a Scene Collection using the following method. It’s crucial to correctly select the Scene Collection name you want to back up.
1. Click “Scene Collection” on the toolbar
2. Check to make sure you’ve selected the correct Scene Collection for export
3. With “Scene Collection” selected, click “Export” on the toolbar
4. Save the output file (file format: .json) to a backup folder of your choosing
How to export a Profile
The process for exporting a Profile also starts from selecting it on the toolbar. Let’s proceed with exporting a Profile using the following method.
1. Click “Profile” on the toolbar
2. Check to ensure you’ve selected the correct Profile for export
3. With “Profile” selected, click “Export” on the toolbar
4. Once the folder is output, save it to a backup folder
As with exporting Scene Collections, make sure to select the Profile you wish to export.
How to back up OBS settings by copying & pasting folders
By copying and pasting folders, you can export Scene Collections and Profiles all at once. Let’s back them up together using the following method.
1. On the top left of the OBS screen, go to “File” → “Show settings folder” and open the folder where settings are saved
2. Copy and save the “basic folder”, “global.ini” or “user.ini” within the settings folder to the backup folder
Items contained in “basic folder”, “global.ini”, and “user.ini” are as follows:
| Folder Name | Included Items |
|---|---|
| basic folder | Contains all settings for Scene Collection and Profile |
| global.ini | Size and position of OBS main window (up to OBS 30.2.3) Selected Scene Collection or Profile, some settings within “Preferences” |
| user.ini | Size and position of OBS main window (OBS 31.0 and after) Selected Scene Collection and Profile |
Additionally, using the folder copy & paste function also allows you to back up plugins used in OBS.
1. Navigate as follows on the top left of the OBS screen: “File” → “Show settings folder”, and open the settings folder
2. Copy “plugin_config” from within the settings folder and paste it into the backup folder
While backing up OBS plugins, please pay attention to the following three points:
- Only administrators can copy & paste plugins, so if you’re sharing a PC, perform this task with an admin account
- If “Folder Access Denied” pops up, continue with an admin account
- You cannot copy & paste Cookies while OBS is running, so close OBS after opening the settings folder
How to restore (import) backed-up settings
Importing OBS-backed settings allows you to use existing settings for streaming on a different PC. Importing is the process of converting a file created on a different application into a readable file format. Proceed with restoring exported settings by either of the following methods.
- How to restore (import) a Scene Collection or Profile
- How to restore (import) plugins
How to restore (import) a Scene Collection or Profile
We’ll explain how to import a Scene Collection or Profile in two patterns as follows.
- How to restore (import) individually
- How to restore (import) in bulk
Like when exporting settings, you can choose to restore them individually or all at once during importing as well.
How to restore (import) individually
The method for importing a Scene Collection or Profile is quite simple. When importing individually, proceed as follows.
1. On the OBS toolbar at the top of the screen, click in this order: “Scene Collection” or “Profile” → “Import”
2. Click on the folder (in the case of Scene Collections, the “.json format” file) to complete the import
How to restore (import) in bulk
If you want to import Scene Collections or Profiles all at once, the process can be handled with copy & paste the same way as when exporting. Proceed with the steps below to import your settings.
1. Open the OBS settings folder and close the OBS system
2. Copy the previously saved “basic folder”, “global.ini”, and “user.ini”
3. Paste the “basic folder”, “global.ini”, and “user.ini” into the settings folder, replacing the individual files
How to restore (import) plugins
The import of plugins is also simple, just overwrite the saved “plugin_config”.
As with backing up plugins, import must be performed with administrative privileges, so caution is advised. Overwrite “plugin_config” with the OBS system terminated.
It is also possible to back up settings using plugins
When backing up settings in OBS, you can also use backup-specific plugins. Using a plugin like “Scene Collection Manager” makes it convenient to back up OBS scenes and manage Scene Collections.
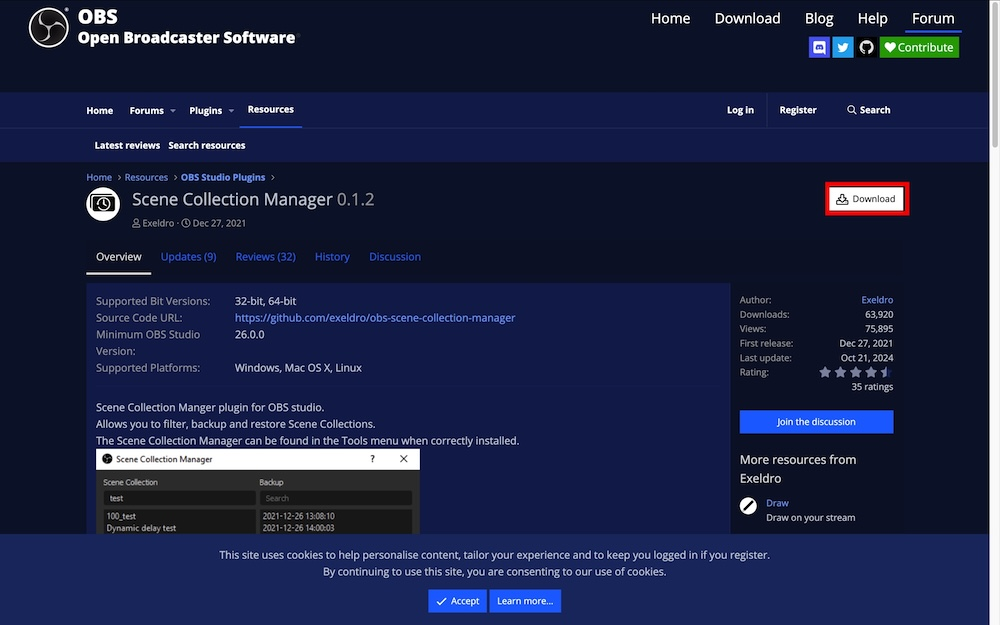
You can download the latest version of “Scene Collection Manager” from the official OBS site or forums, so feel free to use it. Here’s how you can download and utilize “Scene Collection Manager”.
1. Download “Scene Collection Manager” from the official OBS site or forums by following the instructions
2. Click “Scene Collection Manager” from the toolbar at the top of the OBS screen
When using “Scene Collection Manager”, you can view the list and management options for Scene Collections within the window. The operations are straightforward and easy to understand, like adding Scene Collections from the new window’s “+” or deleting the unnecessary ones with the “-“. You can also change the Scene Collection name by clicking the “gear” icon, so it’s wise to back up according to your streaming needs.
For further details on recommended plugins that can be useful for OBS streaming and how to install them, please refer to the articles below.
How to Install Plugins in OBS and Recommended Ones
Top OBS Plugins for Streamers: Recommended by Purpos
Points to note when backing up with OBS
When backing up settings in OBS, be sure to proceed with attention to the following:
- Pay attention to the file name when overwriting files
- Be sure to also save copies of any images or videos within the sources
When backing up with OBS, be mindful of file overwriting names. If you save with the same name as an existing backup file, the past backup content will be lost. Since data will not be recoverable once backup data has been overwritten, it’s recommended to change the name when taking new backups.
Furthermore, if you want to keep past backup files, consider adding a date to the file or saving it to external memory for safety.
While this article introduces how to back up OBS settings, be sure to separately copy and save any images, videos, or other data within the sources used in OBS. OBS references data within the PC to incorporate images or videos into the sources. Since it doesn’t install the data added to the source, when you change PCs, the source path changes, and they won’t display. When moving Scene Collections to another PC or switching PCs, make sure to back up recorded videos or images so you can restore the data.
For more detailed explanations about saving in OBS, please refer to the article below.
OBS Setup Guide: 2 Ways to Save Settings, Backup & Restore
This time, we explained how to back up OBS settings. By taking a backup, you can smoothly restore settings in case of any trouble or when migrating PCs. Also, by leveraging plugins, managing backups becomes even more straightforward.