Share
How to Stream Games on OBS Studio: Beginner’s Guide
Index

Let’s Download and Install OBS Studio!
OBS Studio is a high-functioning game streaming software that’s available for free. It comes with various features that make it easy for beginners to start game streaming. First, let’s download and install OBS Studio.
How to Download
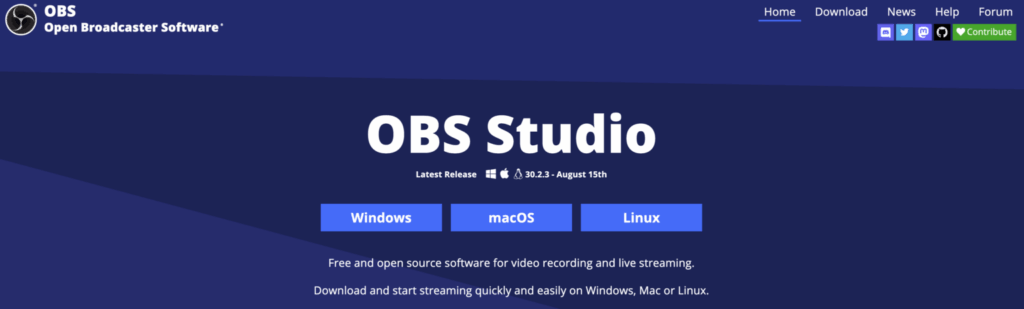
Visit the official OBS Studio website, select the version that matches the OS of your PC, and download it.
Installation Steps
When you run the downloaded file, an installer will start. Follow the on-screen instructions to proceed with the installation. It’s pretty straightforward, so you can continue without any issues. Once the installation is complete, try launching OBS Studio.
Preparation and Setup Flow for Game Streaming
Once you start OBS Studio, it’s time to get ready for streaming. Here, we’ll explain the configuration steps necessary for game streaming in detail.
Creating a Scene
A scene is the layout of the streaming screen. You can freely arrange game screens, camera footage, text, etc., to design your streaming screen. With OBS Studio, you can create multiple scenes and switch between them during the stream. For example, you can have a scene that shows only the game screen during gameplay, and another that displays the camera footage and text during breaks, switching according to your streaming content.
Adding and Configuring Sources
You’ll add what you want to display on the streaming screen (game screen, camera footage, text, etc.) as sources. By adding sources, you can freely position what you want to display on the streaming screen.
Adding Game Capture
To stream a game, you first need to display the game screen in OBS Studio. Add a game capture. Click the “+” button in the “Sources” section and select “Game Capture.”
Setting the Mode
In the “Mode” setting for game capture, you’ll specify the capture method for the game screen. Selecting “Window Capture” captures the game window only. Selecting “Fullscreen Capture” captures the entire game screen. Depending on the game, one mode may be more stable than the other, so try streaming to see which works best.
Settings for Using a Capture Board
If you’re using a capture board to stream video from a game console, add a “Video Capture Device.” Click the “+” button in the sources section and select “Video Capture Device.” You’ll need to configure settings appropriate for the type of capture board and connection method.
Audio Configurations
In game streaming, delivering both game audio and your voice to the audience is essential. Therefore, setting up the microphone and desktop audio in OBS Studio is crucial.
Microphone Settings
In microphone settings, you’ll configure according to the type and connection method of the microphone you’re using. Click the “+” button in the “Microphone” section and select your microphone. Depending on the microphone type, there may be settings for input sensitivity and noise suppression, so adjust them according to your environment. Also, the position and angle of the microphone can influence audio quality, so experiment to find the best placement.
Desktop Audio Settings
In desktop audio settings, you configure whether to include game audio in the stream. Click the “+” button in the “Desktop Audio” section and select “Desktop Audio” if you want to include game audio in the stream. If you don’t want to include it, leave the “Desktop Audio” section empty. You can also adjust the volume of the game and microphone audio, which will impact the sound quality during streaming, so make appropriate adjustments for your environment.
How to Start and Stop Game Streaming
Once you’re ready for game streaming, it’s time to start your stream. To begin streaming, you’ll need to configure the stream key and choose a streaming platform.
Connecting with a YouTube Account
By connecting directly from OBS Studio to your YouTube account, you can configure your stream settings.
- Open the settings screen in OBS Studio and select the “Stream” tab.
- Choose “YouTube – RTMPS” as the service and click “Connect Account.”
- Follow the instructions on the Google login screen to allow access to your YouTube account.
Selecting a Streaming Platform
To stream games, you need to choose a streaming platform. There are many streaming platforms, with famous ones including YouTube Live, TwitCasting, Twitch, etc. Each platform has different features and user demographics, so choose one that matches your streaming content and goals.
YouTube
YouTube offers a live streaming service on a globally popular video sharing site. It is free to use if you have a Google account. YouTube Live is ideal for reaching a global audience, and you can also utilize features like archiving, editing, and monetization of broadcasts.
TwitCasting
TwitCasting is a live streaming service originating from Japan, allowing you to easily start streaming from a smartphone app. Its ease of use makes it ideal for beginners, with active interaction through the comment section being one of its highlights.
Twitch
Twitch is a popular global platform focusing on game streaming. It features game-specific functionalities and interaction-enhancing capabilities for viewers. The community for game streamers is active, facilitating interactions with other streamers and viewer support. It’s also recommended for those aiming for a global reach, given its significant overseas user base.
Mirrativ
Mirrativ is a live streaming service specializing in smartphone games. Its main feature is the ease of starting smartphone game streams, making it beginner-friendly. It boasts features that promote viewer interaction, allowing communication between streamers and viewers through comments and gifts. If you’re interested in streaming smartphone games, give Mirrativ a try.
Preparing for Streaming
Download and Install Software
1. Download and install OBS Studio from the official OBS Studio website.
2. Once installation is complete, start OBS Studio.
Initial Configuration
1. On the first launch, the Auto-Configuration Wizard will appear. Follow the guide to perform the initial setup.
2. Choose your streaming platform (YouTube, Twitch, etc.) and connect your account.
Steps to Start Streaming
1. Configure Scenes and Sources
• Add a new scene in the “Scenes” section at the bottom of the screen.
• Add game capture, window capture, or display capture in the “Sources” section.
2. Audio Setup
• Adjust the volume for microphone and desktop audio in the “Mixer” section.
3.Check the Stream
• Click the “Settings” button in the bottom right, and verify the streaming destination settings in the stream tab.
• Check and adjust settings like bitrate and resolution as needed.
4. Start Streaming
• Click the “Start Streaming” button at the top of the OBS Studio screen.
• Once streaming starts, the streaming status will be displayed in the bottom right of the screen.
• After confirming that the stream has started normally, start playing and broadcasting your game.
Steps to Stop Streaming
• Click the “Stop Streaming” button at the top of the OBS Studio screen.
• Once streaming is stopped, the streaming status will be displayed in the bottom right of the screen, verifying that the stream has stopped.
Now, you should have a good understanding of the process from preparation to start and stop streaming games using OBS Studio. For detailed settings and troubleshooting, refer to the official OBS Studio guide and online forums.
Enhance Your Game Streaming with Convenient OBS Studio Features
OBS Studio is equipped with various features to make your streaming more enjoyable and effective. Here are two particularly useful features.
Scene Transitions
Scene transitions allow you to switch between multiple screens during the stream. For instance, you can alternate between game-play screens and face-cam views, or magnify specific scenes within the game. This enriches the content of your stream, making it more captivating for viewers.
Adding Filters
Filters let you add various effects to your streaming screen. For example, you can blur the screen, adjust color tones, or overlay text and images. This allows for a more personalized presentation of your stream.
Troubleshooting Common Game Streaming Issues
When starting out in game streaming, you may encounter various troubles. Here, we summarize common issues and their solutions.
No Sound
If you’re not hearing audio during your game stream, check these points.
- Ensure the microphone is correctly connected and not muted.
- Check that the microphone is selected in OBS Studio’s settings and that input volume is set appropriately.
- Verify that the desktop audio is not muted.
- Ensure that the audio is not muted on the streaming platform side.
If you’re still not getting any sound even after following the steps above, this article might help.
No Sound in OBS? A Clear Guide to Fixing Audio Issues by Symptom
No Screen Display
If there’s no screen display, check these points.
- Ensure that the correct game is selected in game capture settings.
- Verify that the game capture mode is set to “Window Capture” or “Game Capture.”
- Confirm that the screen is displaying correctly on the streaming platform side.
If these points do not resolve the issue, try restarting OBS Studio or your computer.
If your game screen still isn’t showing up in OBS after trying the above steps, be sure to check out this article.
OBS Game Capture Not Working? Detailed Fixes Based on the Root Cause
Stream Is Lagging
If your stream is lagging, check these points.
- Verify that the bitrate is set appropriately in the streaming settings.
- Ensure your computer’s specs meet the performance requirements for streaming.
- Confirm that other applications are not running during the stream.
- Check that your internet connection is stable.
If your stream still feels laggy or choppy after reviewing the above tips, be sure to check out this article.
Easy Fixes for OBS Lag: Causes and Solutions for a Smoother Stream
Stream Keeps Cutting Out
If your stream is cutting out, check these points.
- Check if your internet connection is stable.
- Verify that the bitrate is set appropriately in the streaming settings.
- Ensure there are no problems on the streaming platform side.
If these steps do not solve the problem, try restarting OBS Studio or your computer.